A rave totem is a simple solution to a very real festival problem: finding your friends in a packed crowd when cell service is weak, batteries are dying, and every stage looks the same after dark.
At its most basic, a totem is a visual marker on a pole. Done well, it becomes your group’s lighthouse: easy to spot, easy to carry, safe around other people, and allowed through the gate. Done badly, it becomes heavy, floppy, blocked by security, or hated by everyone standing behind you.
This guide focuses on building a rave totem that is:
-
Lightweight enough to carry for hours
-
Strong enough to survive a weekend
-
Visible during the day and at night
-
Easy to disassemble and transport
-
Designed with festival rules and crowd etiquette in mind
Before buying materials, check the official totem policy for your specific event. Rules vary. Some festivals allow lightweight foam or PVC totems under a set height, while others ban poles, flags, or “doof sticks” entirely. For example, Insomniac’s published totem guidance allows lightweight materials, bans solid metal, and lists a 10-foot maximum height for applicable events. North Coast Music Festival’s FAQ lists a 10-foot maximum and bans wood, metal poles, and collapsible camera extenders. Some Australian event terms prohibit “doof sticks or totem poles” altogether. Always treat your event’s official rule page as the final authority.

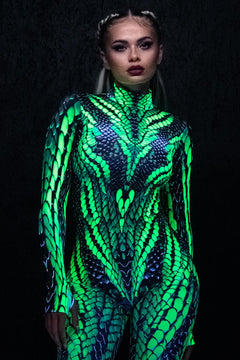
@dianab_fitness wearing Poison Fairy Set
What Is a Rave Totem?
A rave totem is a portable visual marker used to help a group find each other at a music festival or rave. It is usually made from a pole and a visible topper, such as a sign, flag, inflatable, foam sculpture, or light-up design.
The best totems are not necessarily the biggest or most complicated. They are the ones people can recognize quickly from a distance.
A good rave totem should answer three questions:
-
Can your friends spot it from 30 - 50 feet away?
-
Can someone carry it comfortably for several hours?
-
Will security allow it into the venue?
Everything else, LEDs, memes, flags, 3D foam, QR codes, sound-reactive lights, is optional flair.
Quick Build Recommendation
For most first-time builders, the best all-around rave totem is:
A lightweight coroplast sign on a fiberglass or festival-approved PVC pole, with battery-powered LEDs and zip-tie reinforcement.
That design gives you the best balance of visibility, durability, weather resistance, and portability. Foam board is cheaper, but it needs waterproofing. EVA foam looks better for 3D builds, but it takes more work and can become heavy. Inflatables are very visible, but they behave like sails in wind and can be annoying in dense crowds.
Festival Rules: Check These Before You Build
Do this before cutting, gluing, printing, soldering, or buying anything.
Look for your festival’s official policy on:
-
Maximum height
-
Maximum width
-
Pole diameter
-
Whether telescoping poles are allowed
-
Whether PVC, fiberglass, foam, fabric, or coroplast are allowed
-
Whether metal or wood is banned
-
Whether inflatables are allowed
-
Whether lights or batteries are restricted
-
Whether offensive, branded, political, or commercial content is prohibited
-
Whether signs, flags, or totems are banned entirely
Do not rely on what worked at another festival. A totem that passes at one event may be rejected at another.
As a safe starting point, avoid:
-
Metal poles
-
Wood poles
-
Sharp edges
-
Heavy toppers
-
Hard objects above head height
-
Glass
-
Large hard frames
-
Offensive imagery
-
Anything that looks like a weapon
-
Anything too wide to move through a crowd safely

@kosmickay_ wearing Wavy Baby Skirt Set
Materials Comparison
|
Totem Type |
Main Materials |
Estimated Cost |
Difficulty |
Best For |
Watch Out For |
|
Classic meme sign |
Foam board, printed image, clear tape or laminate, zip ties |
$15–$30 |
Easy |
First-time builders |
Foam board fails quickly in rain unless sealed |
|
Light-up box |
Coroplast, LED strips, USB power bank, wiring |
$40–$90 |
Medium |
Night visibility |
Requires clean wiring and waterproofing |
|
Inflatable character |
Pool inflatable, straps or zip ties, approved pole |
$25–$60 |
Easy |
Maximum visibility with low weight |
Wind drag and crowd navigation |
|
3D foam build |
EVA foam, contact cement, paint, sealant |
$50–$120+ |
Hard |
Custom art builds |
Time, weight, and balance |
|
EL wire outline |
EL wire kit, acrylic sheet or wire frame |
$30–$70 |
Easy-medium |
Neon-style outlines |
Dimmer than LEDs |
|
Custom flag |
Printed fabric flag, approved pole |
$40–$90 |
Easy |
Portability |
Some festivals restrict flags or poles |
Choosing the Pole
The pole is your totem’s backbone. It determines how stable, portable, and rule-compliant the whole build will be.
Best option: fiberglass telescoping pole
A fiberglass telescoping pole is usually the best choice when the festival allows it. These are often sold as windsock poles, light-duty flagpoles, or camping poles.
Pros:
-
Lightweight
-
Collapsible
-
Easy to transport
-
Less risky than metal at many festivals
-
Better flex than rigid PVC
Cons:
-
Can whip around if overloaded
-
Twist-lock sections can slip
-
Not always allowed, depending on the event
Budget option: PVC pipe
PVC can work, but it is less convenient.
Pros:
-
Cheap
-
Easy to find
-
Easy to cut and drill
-
Often accepted where lightweight PVC is allowed
Cons:
-
Not naturally collapsible
-
Awkward to transport in long lengths
-
Can flex too much
-
May be banned at some venues
Avoid unless explicitly allowed: metal and wood
Many festivals restrict or ban metal and wood poles because they can be dangerous in crowds. Even if a metal painter’s pole looks sturdy, it may be confiscated at entry. Do not assume it is acceptable unless the festival rules clearly allow it.
Choosing the Topper
The topper is the part people actually see. Choose the material based on your design, not just cost.
Foam board
Foam board is the easiest material for a simple sign.
Use it for:
-
Printed memes
-
Group logos
-
Simple shapes
-
Lightweight signs
Advantages:
-
Cheap
-
Very light
-
Easy to cut
-
Easy to print and mount
Weaknesses:
-
Bad in rain
-
Corners dent easily
-
Can crease or snap
-
Needs sealing
How to make it better:
-
Laminate the print
-
Cover both sides with clear packing tape
-
Reinforce the back with thin dowels or extra foam strips
-
Round the corners so they are not sharp
Coroplast
Coroplast is corrugated plastic, similar to the material used for yard signs. It is one of the best practical materials for rave totems.
Use it for:
-
Weather-resistant signs
-
Light-up boxes
-
LED diffusers
-
Reusable festival builds
Advantages:
-
Lightweight
-
Waterproof
-
More durable than foam board
-
Translucent versions diffuse LEDs well
Weaknesses:
-
Harder to cut cleanly than foam board
-
Edges can look rough without finishing
-
Needs careful joining for box builds
EVA foam
EVA foam is the go-to material for custom 3D shapes, cosplay-style builds, cartoon characters, masks, and sculpted toppers.
Use it for:
-
3D art
-
Character heads
-
Layered shapes
-
Durable sculpted designs
Advantages:
-
Flexible
-
Durable
-
Shapeable with heat
-
Paintable
-
Safer than hard plastics
Weaknesses:
-
More labor-intensive
-
Can become heavy
-
Needs contact cement or strong adhesive
-
Needs sealing before paint
Inflatables
Inflatables are the fastest way to get a large, visible totem without adding much weight.
Use them for:
-
Pool toys
-
Characters
-
Simple high-visibility builds
Advantages:
-
Very light
-
Very visible
-
Easy to assemble
-
Easy to deflate and pack
Weaknesses:
-
Hard to manage in wind
-
Can block views
-
Can pop
-
Can be difficult in dense crowds
Adhesives and Fasteners
Most totems fail at the connection points. The glue, tape, and fasteners matter as much as the design.
Zip ties
Zip ties are essential. Use them for attaching the topper, securing wires, reinforcing joints, and making quick repairs.
Best uses:
-
Attaching signs to pole mounts
-
Securing wiring
-
Backup reinforcement
-
Field repairs
Tip: use more than you think you need, and trim the sharp ends.
Hot glue
Hot glue is useful, but do not rely on it as your main structural adhesive.
Best uses:
-
Temporary positioning
-
Light foam details
-
Cable strain relief
-
Sealing small gaps
Do not use hot glue as the only thing holding your topper to the pole. Heat, vibration, and movement can weaken it.
Contact cement
Contact cement is excellent for EVA foam.
Best uses:
-
EVA foam seams
-
Foam layering
-
Permanent foam-to-foam bonds
Use it carefully. Apply it to both surfaces, let it become tacky, then press the pieces together. Once contact cement bonds, repositioning is difficult.
Industrial adhesive
A flexible industrial adhesive can work well for mixed materials, such as plastic-to-foam or plastic-to-PVC connections.
Best uses:
-
Permanent mounts
-
Weather-resistant joins
-
Mixed-material builds
Allow proper curing time before the festival. Do not glue the night before and expect full strength.
Gaffer tape
Bring gaffer tape to the festival. It is better than duct tape for most field repairs because it is strong, cloth-backed, and usually leaves less residue.
Best uses:
-
Reinforcing pole joints
-
Emergency repairs
-
Securing battery packs
-
Wrapping loose connections
-
Temporarily stabilizing broken parts
How to Build a Strong Totem
The most common failure point is where the topper connects to the pole. Do not simply glue a sign to the end of a stick. It will bend, wobble, or break.
Step 1: Build a real mounting point
For a flat sign, attach a short piece of PVC, a pipe coupler, or a lightweight mounting sleeve to the back of the topper. This spreads the load instead of concentrating all the force at one tiny point.
For a 3D foam topper, build the socket into the foam structure while assembling it. The pole should slide into a reinforced channel, not poke into a weak spot.
Step 2: Find the center of gravity
Before final attachment, balance the topper on your hand or a dowel. Mark the point where it naturally balances.
Mount the pole as close to that balance point as possible. If the topper is off-center, your wrist and shoulder will fight it all day.
Step 3: Reinforce in more than one way
Use redundancy. A good rule is:
Glue holds the position. Zip ties or mechanical fasteners provide backup strength. Tape protects and stabilizes the joint.
For flat signs, reinforce the back with:
-
Thin dowels
-
Coroplast strips
-
Extra foam board strips
-
Lightweight plastic ribs
For 3D foam builds, reinforce stress points from the inside before sealing the final layer.
Step 4: Weatherproof the build
Assume it may rain.
Weatherproofing checklist:
-
Laminate paper signs
-
Seal foam board edges
-
Use waterproof materials where possible
-
Keep batteries in a sealed plastic bag or small enclosure
-
Protect microcontrollers from moisture
-
Use heat-shrink tubing on solder joints
-
Seal painted foam with a clear acrylic coating
-
Pack extra zip ties and gaffer tape
Step 5: Design for disassembly
Your totem should fit in a car, hotel room, shuttle, or campsite.
A good festival totem should break down into:
-
Collapsed pole
-
Detachable topper
-
Separate battery pack
-
Repair kit
Test assembly and disassembly before the event. You should be able to put it together in low light without special tools.
Lighting Options
A light-up totem is much easier to find at night. The best lighting choice depends on your skill level.
Fairy lights
Best for beginners.
Pros:
-
Cheap
-
Easy
-
Battery-powered
-
No soldering needed
Cons:
-
Not very bright
-
Limited control
-
Can tangle
EL wire
Best for simple glowing outlines.
Pros:
-
Flexible
-
Lightweight
-
Distinct neon-style look
-
Usually sold in ready-to-use kits
Cons:
-
Dimmer than LED strips
-
Battery inverter may make a faint high-pitched sound
-
Not ideal for bright stage environments
Basic LED strips
Best for bright, simple lighting.
Pros:
-
Bright
-
Affordable
-
Good for signs and boxes
-
Available in USB-powered versions
Cons:
-
Less customizable than programmable LEDs
-
Needs clean wiring
-
Can drain batteries quickly
Addressable LEDs
Best for advanced builds.
Addressable LEDs, such as WS2812B-style strips, allow each LED to display a different color. This makes animations, rainbow effects, pulses, and patterns possible.
Pros:
-
Highly visible
-
Fully customizable
-
Great for animated designs
-
Works well with microcontrollers
Cons:
-
Requires more planning
-
Usually needs soldering
-
Needs a controller, such as an ESP32
-
Can draw significant power
-
More failure points
A popular control option is WLED on an ESP32 microcontroller. It lets you change colors and effects through a phone browser. Test this fully before the event. Do not make your first wiring attempt at the campsite.
Power Planning for LED Totems
Most LED totems can run from a USB power bank, but you need to estimate power draw before building.
Simple power estimate
A single addressable LED can draw up to about 60mA at full white brightness. Most colorful animations use less, but it is smart to plan conservatively.
Use this quick estimate:
Estimated amps = number of LEDs × 0.02A
For a safer upper estimate:
Safer estimate = number of LEDs × 0.03A
Examples:
|
Number of LEDs |
Practical Estimate |
Safer Estimate |
|
50 LEDs |
1.0A |
1.5A |
|
100 LEDs |
2.0A |
3.0A |
|
150 LEDs |
3.0A |
4.5A |
|
200 LEDs |
4.0A |
6.0A |
Check your power bank’s output rating. A common USB port may provide 2.1A or 3A. If your LED design needs more than that, reduce brightness, use fewer LEDs, split the power, or choose a more appropriate battery setup.
For most festival totems, 50 - 100 LEDs is plenty.
Battery tips
-
Start with a fully charged power bank
-
Bring a backup power bank
-
Keep batteries dry
-
Avoid loose battery packs swinging from wires
-
Secure the battery near the pole handle or lower section
-
Test runtime before the festival
A 20,000mAh power bank is a reasonable starting point for many LED builds, but actual runtime depends on LED count, brightness, effects, and power bank efficiency.
Wiring Tips That Prevent Failures
Festival movement destroys weak wiring. You will walk, dance, bump into people, set the totem down, lift it up, and pack it repeatedly.
Use these wiring practices:
-
Solder important connections
-
Cover solder joints with heat-shrink tubing
-
Avoid relying on clip-on LED connectors
-
Use 22 AWG wire for short, low-power runs
-
Use thicker 18 - 20 AWG wire for higher current or longer runs
-
Add strain relief near every solder joint
-
Secure wires to the frame with zip ties or hot glue
-
Keep the controller and battery protected from rain
-
Test the full system while shaking and moving the totem gently
Strain relief is especially important. The solder joint should not carry physical stress. Tie or glue the wire to the structure an inch or two away from the joint so a snag pulls on the tie, not the solder.

@tatum.elyse wearing Aurora Venom Bodysuit
Build Ideas by Skill Level
Beginner: laminated meme sign
Best for first-timers.
Materials:
-
Foam board or coroplast
-
Printed design
-
Clear packing tape or laminate
-
Zip ties
-
Approved pole
-
Optional fairy lights
Why it works:
-
Cheap
-
Easy to build
-
Easy to recognize
-
Fast to repair
Upgrade it by using coroplast instead of foam board.
Beginner: inflatable character
Best for maximum visibility with minimal construction.
Materials:
-
Lightweight inflatable
-
Approved pole
-
Soft straps or zip ties
-
Backup tape
-
Small repair patch kit
Why it works:
-
Very visible
-
Lightweight
-
Funny
-
Easy to pack
Reality check: it will catch wind. Keep it small enough to control.
Intermediate: coroplast light box
Best for night visibility.
Materials:
-
Translucent coroplast
-
LED strip
-
USB power bank
-
Switch or controller
-
Zip ties
-
Heat-shrink tubing
-
Waterproof battery pouch
Why it works:
-
Durable
-
Weather-resistant
-
Bright at night
-
Cleaner than exposed LEDs
Build tip: place LEDs inside the box facing inward or sideways so the coroplast diffuses the light instead of showing harsh points.
Advanced: 3D EVA foam topper
Best for custom art builds.
Materials:
-
EVA foam sheets
-
Contact cement
-
Heat gun
-
Craft knife
-
Primer/sealer
-
Acrylic paint
-
Reinforced mounting socket
-
Optional LEDs
Why it works:
-
Highly original
-
Durable if built well
-
Safer than hard sculpture materials
-
Great for recognizable characters or symbols
Reality check: keep it light. A beautiful topper that weighs too much will become miserable by hour two.
Advanced: programmable LED totem
Best for people comfortable with electronics.
Materials:
-
Addressable LED strip
-
ESP32 or similar controller
-
WLED or custom code
-
USB power bank or suitable battery
-
Soldering tools
-
Heat-shrink tubing
-
Waterproof enclosure
Why it works:
-
Extremely visible at night
-
Customizable
-
Can run animations
-
Can match group themes or stage vibes
Reality check: test the full setup for several hours before the festival.
Totem Etiquette: How Not to Be “That Person”
A good totem helps your group without ruining the show for everyone behind you.
Follow these rules:
-
Do not hold a large totem up for an entire set
-
Lower it during big visual moments
-
Raise it briefly when friends are trying to find you
-
Keep it vertical when moving through crowds
-
Watch for people’s heads, drinks, phones, and hats
-
Do not swing it around while dancing
-
Share carrying duty with your group
-
Move to the side or back if your totem is very large
-
Avoid blocking ADA viewing areas or camera sightlines
The golden rule: use the totem as a beacon, not a billboard.
Field Repair Kit
Pack a small repair kit. It can save the whole weekend.
Recommended repair kit:
-
Zip ties in multiple sizes
-
Gaffer tape
-
Clear packing tape
-
Small scissors or snips
-
Spare USB cable
-
Spare power bank
-
Small plastic bags
-
Heat-shrink tubing, if you have a heat source at camp
-
Mini tube of strong adhesive for campsite repairs
-
Safety pins or clips
-
Printed copy or screenshot of the festival totem rules
Troubleshooting Common Totem Problems
Problem: the topper wobbles
Likely cause:
-
Weak connection between topper and pole
-
Mounting point too small
-
Topper is off-center
Fix:
-
Add zip ties in an X-pattern
-
Wrap the joint with gaffer tape
-
Lower the pole slightly to reduce flex
-
Rebuild the mount after the event with a wider support point
Problem: the pole collapses
Likely cause:
-
Twist-lock section slipping
-
Too much weight at the top
-
Pole extended too far
Fix:
-
Tighten the lock
-
Wrap the joint with gaffer tape
-
Reduce height
-
Remove unnecessary topper weight
Problem: LEDs flicker
Likely cause:
-
Loose USB cable
-
Weak solder joint
-
Power bank cannot supply enough current
-
Voltage drop on a long LED run
Fix:
-
Try a different USB cable
-
Check the first LED connection
-
Lower brightness
-
Use fewer LEDs
-
Add power injection for larger builds
-
Use a higher-output power source if appropriate
Problem: only the first few LEDs light up
Likely cause:
-
Bad data connection
-
LED strip wired in the wrong direction
-
Software configured for the wrong LED count
-
Damaged LED early in the strip
Fix:
-
Check the arrow direction on the LED strip
-
Re-solder the data line
-
Confirm the LED count in your controller software
-
Test with a shorter strip
Problem: rain starts
Likely risk:
-
Battery or controller damage
-
Paper sign damage
-
Adhesive failure
Fix:
-
Bag the battery and controller immediately
-
Lower the totem if wind increases
-
Keep exposed connections away from water
-
Dry and inspect everything before turning LEDs back on
Pre-Festival Testing Checklist
Do this before you leave home.
-
Read the current official totem policy for your festival
-
Measure the full height
-
Measure the width
-
Check pole material and diameter
-
Collapse and pack the pole
-
Detach and reattach the topper
-
Shake-test the mount gently
-
Carry it for 20–30 minutes
-
Test lights for at least two hours
-
Test backup batteries
-
Waterproof paper, paint, and electronics
-
Remove sharp edges
-
Pack repair supplies
-
Save a screenshot of the festival rules
Commonly Asked Questions
Read questions we get asked.
How tall should a rave totem be?
Use your festival’s maximum height as the limit, not the goal. Many events that allow totems list a maximum around 10 feet, but rules vary. A shorter, brighter, more recognizable totem is often better than a tall, unstable one.
What is the best material for a rave totem?
For most people, coroplast is the best topper material because it is light, waterproof, and durable. For the pole, use whatever lightweight, non-metal material your festival allows. Fiberglass telescoping poles are often practical, but not every event allows every pole type.
How do I make sure security does not take my totem?
Read the official rules before building. Then avoid metal, wood, sharp edges, oversized toppers, offensive content, and anything that could look unsafe. Bring a screenshot of the policy in case you need to check details at entry, but remember that security staff still make the final call.
How heavy should a rave totem be?
Keep it as light as possible. A good target is under 5 pounds total, including the pole, topper, lights, batteries, and mounting hardware. Lighter is better because someone has to carry it for hours.
Are LED rave totems worth it?
Yes, if you attend night sets or multi-stage festivals. A non-lit sign can disappear after dark. Even simple fairy lights can make a totem much easier to find.
What is the easiest rave totem to build?
The easiest build is a laminated foam-board sign zip-tied to an approved lightweight pole. The easiest high-visibility build is a small inflatable attached to an approved pole.
What should I avoid?
Avoid heavy toppers, metal poles, hard sharp frames, weak glue-only mounts, untested electronics, and designs that block the stage for everyone behind you.
Final Recommendation
The best rave totem is not the biggest one. It is the one your friends can find, your arm can survive, security will allow, and the crowd around you will not hate.
For a first build, make a coroplast sign or lightweight foam-board topper, reinforce the mounting point, add simple LEDs, waterproof everything, and keep the design bold enough to recognize from a distance. Once you have carried one through a real festival, you will know exactly what to improve for the next version.